 Breeze Medical
Breeze Medical
Breeze Medical
Accurate serum testing begins before the analyzer starts. The key question is simple: How to centrifuge blood samples for serum separation without damaging the specimen? The answer depends on tube type, clotting time, relative centrifugal force, temperature, and laboratory procedures. Small mistakes can alter results. A delayed separation may encourage cellular metabolism, while excessive force can disturb the serum layer or increase hemolysis.
The World Health Organization identifies the pre-analytical phase as a major source of laboratory error in its Laboratory Quality Management System handbook. CLSI GP44 also emphasizes controlled collection, clot formation, centrifugation, and specimen handling. These recommendations support a practical approach: allow serum tubes to clot fully, balance the rotor, use the manufacturer’s stated RCF, and avoid relying on revolutions per minute alone. Inspect the separated sample under good lighting. Look for hemolysis, lipemia, fibrin, or an incomplete clot. Clear serum should remain above the cell layer.
Real laboratories are less tidy. Staff may face urgent samples, crowded benches, or tubes with unclear labels. That is where judgment matters. Still, improvisation should not replace the approved SOP or tube manufacturer’s instructions. ISO 15189:2022 reinforces the need for documented, competent, and traceable laboratory processes. The exact settings may differ between systems. Therefore, this guide explains how to centrifuge blood samples for serum separation using evidence-based principles, practical checks, and transparent limitations. One point deserves reflection: a visually acceptable serum sample is not automatically a reliable one. Quality depends on every step, from patient identification to final storage.
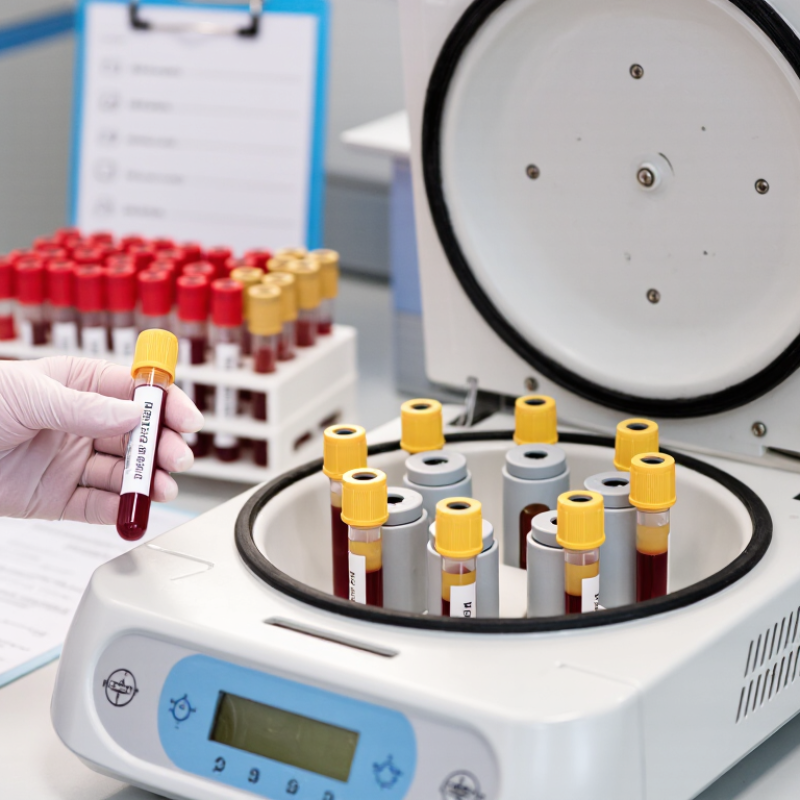
How to Centrifuge Blood Samples for Serum Separation?
Blood collection determines serum quality before centrifugation begins. Confirm patient identity, tube type, and test requirements before venipuncture. Let the skin antiseptic dry completely. Label the tube immediately. Keep tubes upright. Serum tubes need time to clot, usually about 30 minutes at room temperature. Avoid shaking, vigorous transport, or repeated tube inversion. These actions can cause hemolysis and interfere with chemistry results.
A widely cited laboratory-quality review attributes 46–68% of laboratory errors to preanalytical steps, including collection and preparation (Plebani, Clinical Chemistry and Laboratory Medicine, 2006). This figure explains why small handling details matter. After clot formation, inspect the sample for fibrin, clots, or visible hemolysis. Centrifuge according to the laboratory procedure, commonly around 1,000–2,000 × g for 10 minutes. Do not rely on rpm alone; rotor radius changes the actual force. Use the validated settings for that centrifuge and tube.
Separate serum from cells promptly after centrifugation. Transfer it carefully without disturbing the cell layer or clot. A cloudy sample may indicate lipemia, while red discoloration suggests hemolysis. Document these observations rather than silently accepting the specimen. The WHO Guidelines on Drawing Blood recommend careful identification, clean collection, and controlled handling throughout the process. One practical weakness remains: local procedures are sometimes copied without verification. Review them against CLSI GP41 and validate centrifugation settings during routine quality checks. Mistakes still happen, especially when clotting time is shortened during busy shifts.
| Step | Process Dimension | Recommended Practice | Purpose and Key Considerations |
|---|---|---|---|
| 1 | Blood collection tube | Use a tube intended for serum collection and containing no anticoagulant. A tube with a clot activator may be used when permitted by the laboratory method. | Serum is obtained after blood has clotted. Anticoagulants such as EDTA, citrate, or heparin produce plasma rather than serum. |
| 2 | Tube filling | Fill the tube to its marked volume whenever possible. Keep the tube upright immediately after collection. | The intended blood-to-additive ratio and adequate sample volume help support consistent clot formation and accurate testing. |
| 3 | Mixing after collection | Do not vigorously shake a serum tube. If the tube contains a clot activator, gently invert it according to the laboratory procedure, commonly about 5 times. | Excessive agitation can cause hemolysis, which may interfere with visual assessment and some laboratory measurements. |
| 4 | Clotting time | Allow the whole-blood specimen to clot completely before centrifugation, typically for 20–30 minutes at room temperature. Do not exceed the validated time for the specific test. | Incomplete clotting may leave fibrin in the serum, while prolonged contact between cells and serum can change some analyte concentrations. |
| 5 | Clotting temperature | Keep the specimen at controlled room temperature during clot formation unless the test instructions specify another condition. Avoid excessive heat and direct sunlight. | Temperature affects clot formation and the stability of certain analytes. Test-specific instructions take priority over general handling guidance. |
| 6 | Centrifuge preparation | Inspect the tube for cracks, leakage, or incomplete clotting. Place tubes of equal or compatible volume opposite one another and balance the rotor by mass. | Proper balancing reduces vibration and protects both the centrifuge and the specimen. A damaged tube may leak or break during spinning. |
| 7 | Relative centrifugal force | A common starting range for serum separation is approximately 1,000–2,000 × g. Use the validated force specified by the laboratory method or tube instructions. | Relative centrifugal force (RCF), rather than revolutions per minute alone, allows better comparison between centrifuges with different rotor radii. |
| 8 | Centrifugation time | A typical separation time is about 10 minutes after the target RCF is reached. Follow the validated protocol if it specifies a different time. | Adequate time allows cells and clot material to compact, producing a clearer serum layer. Excessive force or time may increase the risk of sample disturbance. |
| 9 | Centrifuge temperature | Use room-temperature centrifugation for tests validated at room temperature. Refrigerated centrifugation should be used only when required by the test procedure. | Cooling can affect clotting and analyte stability. Temperature requirements vary by test, so the laboratory procedure should determine the setting. |
| 10 | After centrifugation | Keep the tube upright and avoid remixing the separated layers. If a gel barrier is present, verify that it forms a continuous barrier between the serum and cellular material. | Disturbing the interface can transfer cells or clot fragments into the serum and may affect downstream results. |
| 11 | Serum transfer | If required, transfer serum with a clean pipette into a properly labeled secondary tube. Do not aspirate cells, clot material, or the gel barrier. | Preventing cellular contamination helps preserve sample quality and reduces the chance of continued cellular metabolism after separation. |
| 12 | Sample inspection | Record visible abnormalities such as hemolysis, lipemia, or icterus according to the laboratory reporting system. Reject or recollect the specimen when required by the test criteria. | These conditions can interfere with analytical methods and should be assessed before testing rather than ignored. |
| 13 | Storage before analysis | Analyze serum as soon as practical. If testing is delayed, store and transport the separated serum according to the analyte-specific stability requirements. | There is no single storage condition suitable for every analyte. Time, temperature, light exposure, and freeze–thaw cycles can affect results. |
| 14 | Documentation and safety | Follow the laboratory’s validated standard operating procedure, use appropriate personal protective equipment, and treat all blood specimens as potentially infectious. | Standardized procedures improve reproducibility, while biosafety practices reduce exposure risks during collection, centrifugation, and handling. |
Use a plain serum tube or a serum-separator tube designed for clot formation. Avoid anticoagulant tubes, because they produce plasma instead of serum.
Check the tube label, expiry date, and required fill volume. An underfilled tube can change the blood-to-additive ratio and reduce reliability.
Keep the tube upright and undisturbed at room temperature for about 20–30 minutes. The laboratory’s validated procedure should control the exact time.
Strong shaking may damage blood cells and cause hemolysis. Gentle handling is safer.
Balance tubes by weight, not appearance. Place tubes with similar volumes opposite each other.
No. Use the validated relative centrifugal force and time for the tube system. Rotor size changes the actual force produced by the same RPM.
A routine setting may be 1,000–2,000 × g for about 10 minutes. Conditions vary with specimen volume, tube design, and laboratory procedure.
Look for hemolysis, lipemia, contamination, or insufficient serum. The serum should appear clear enough for the intended test.
Remove the tube gently and avoid disturbing the gel barrier or packed cells. Transfer serum without touching the clot.
Centrifuging too soon or ignoring a small clot can compromise separation. That shortcut is tempting, but it deserves doubt. Document or reject the specimen when results may be affected.
How to centrifuge blood samples for serum separation begins with careful blood collection and preparation. Use a clean, appropriate serum tube and collect the required volume without introducing unnecessary air or contamination. Allow the blood to clot completely at room temperature before centrifugation, following established laboratory procedures. Inspect the sample for clots, leakage, or visible problems before placing it in the centrifuge.
Balance the centrifuge by arranging tubes of equal or comparable volume opposite one another, then load them securely. Select suitable centrifugation conditions according to the sample type, tube instructions, and laboratory protocol, including the recommended relative centrifugal force and duration. After the run, transfer the clear serum into properly labeled containers without disturbing the clot or cellular layer. Record relevant sample information and store the serum under appropriate temperature conditions for immediate testing or later analysis. Consistent handling helps preserve sample quality, improve result reliability, and reduce the risk of misidentification or contamination.
